

Winter may be over, but if you need a project to get you through this rainy weekend — or if you’re just dreaming of snow from afar — check out this weekend project from our special guest, Mr Midday Musings himself! Today Mr MM (aka Dan) shows us how to build a splitboard for ski touring.
For those of you out there that don’t know me, I’m not exactly known as a risk taker. Adjectives used to describe me typically include reasonable, sensible, cautious, responsible etc. So what would make someone, normally described in these terms, take one of their most prized possessions and cut it in half…?
No, I’m not going mad — it was the call of the snow siren, beckoning me to come and explore the great, untracked, white wilderness; so close to home but so far away…
The plan was to cut my old but dear snowboard in half and use it to climb mountains, accessing the amazing back-country skiing around BC.
The project was ambitious and risky. Ambitious due to my lack skill with tools, and risky as one mistake could render my precious snowboard useless. Fortunately, I was able to enlist the skills of my good friend Mickey, one who is skilled with his hands and has previously created his own splitboard.
To start with, you’ll need one snowboard that you’re willing to cut in half. I had an old Arbor Element board that I rarely used at home. While rarely used, this board was very special to me — it was my first board, the board I really developed on, a beautiful wooden beast that was a work of art in itself. A board I had taken around the world with me. A board that had cost a small fortune to buy as a student in Australia many years ago…
Given the sentimental value of the board, the decision to split it was not taken lightly; however, the potential to give it a new lease of life by taking it into the secret powder bowls and couloirs not accessible to the masses at Whistler or Cypress was too alluring to resist.


You will need:
- A Voilé split kit (provides all the hardware required to keep the board together and mount the bindings for climbing or boarding mode)
- An electric saw
- A hacksaw
- An electric drill
- An electric sander
- Varnish
- Epoxy glue (West Systems G-Flex epoxy recommended)
Method
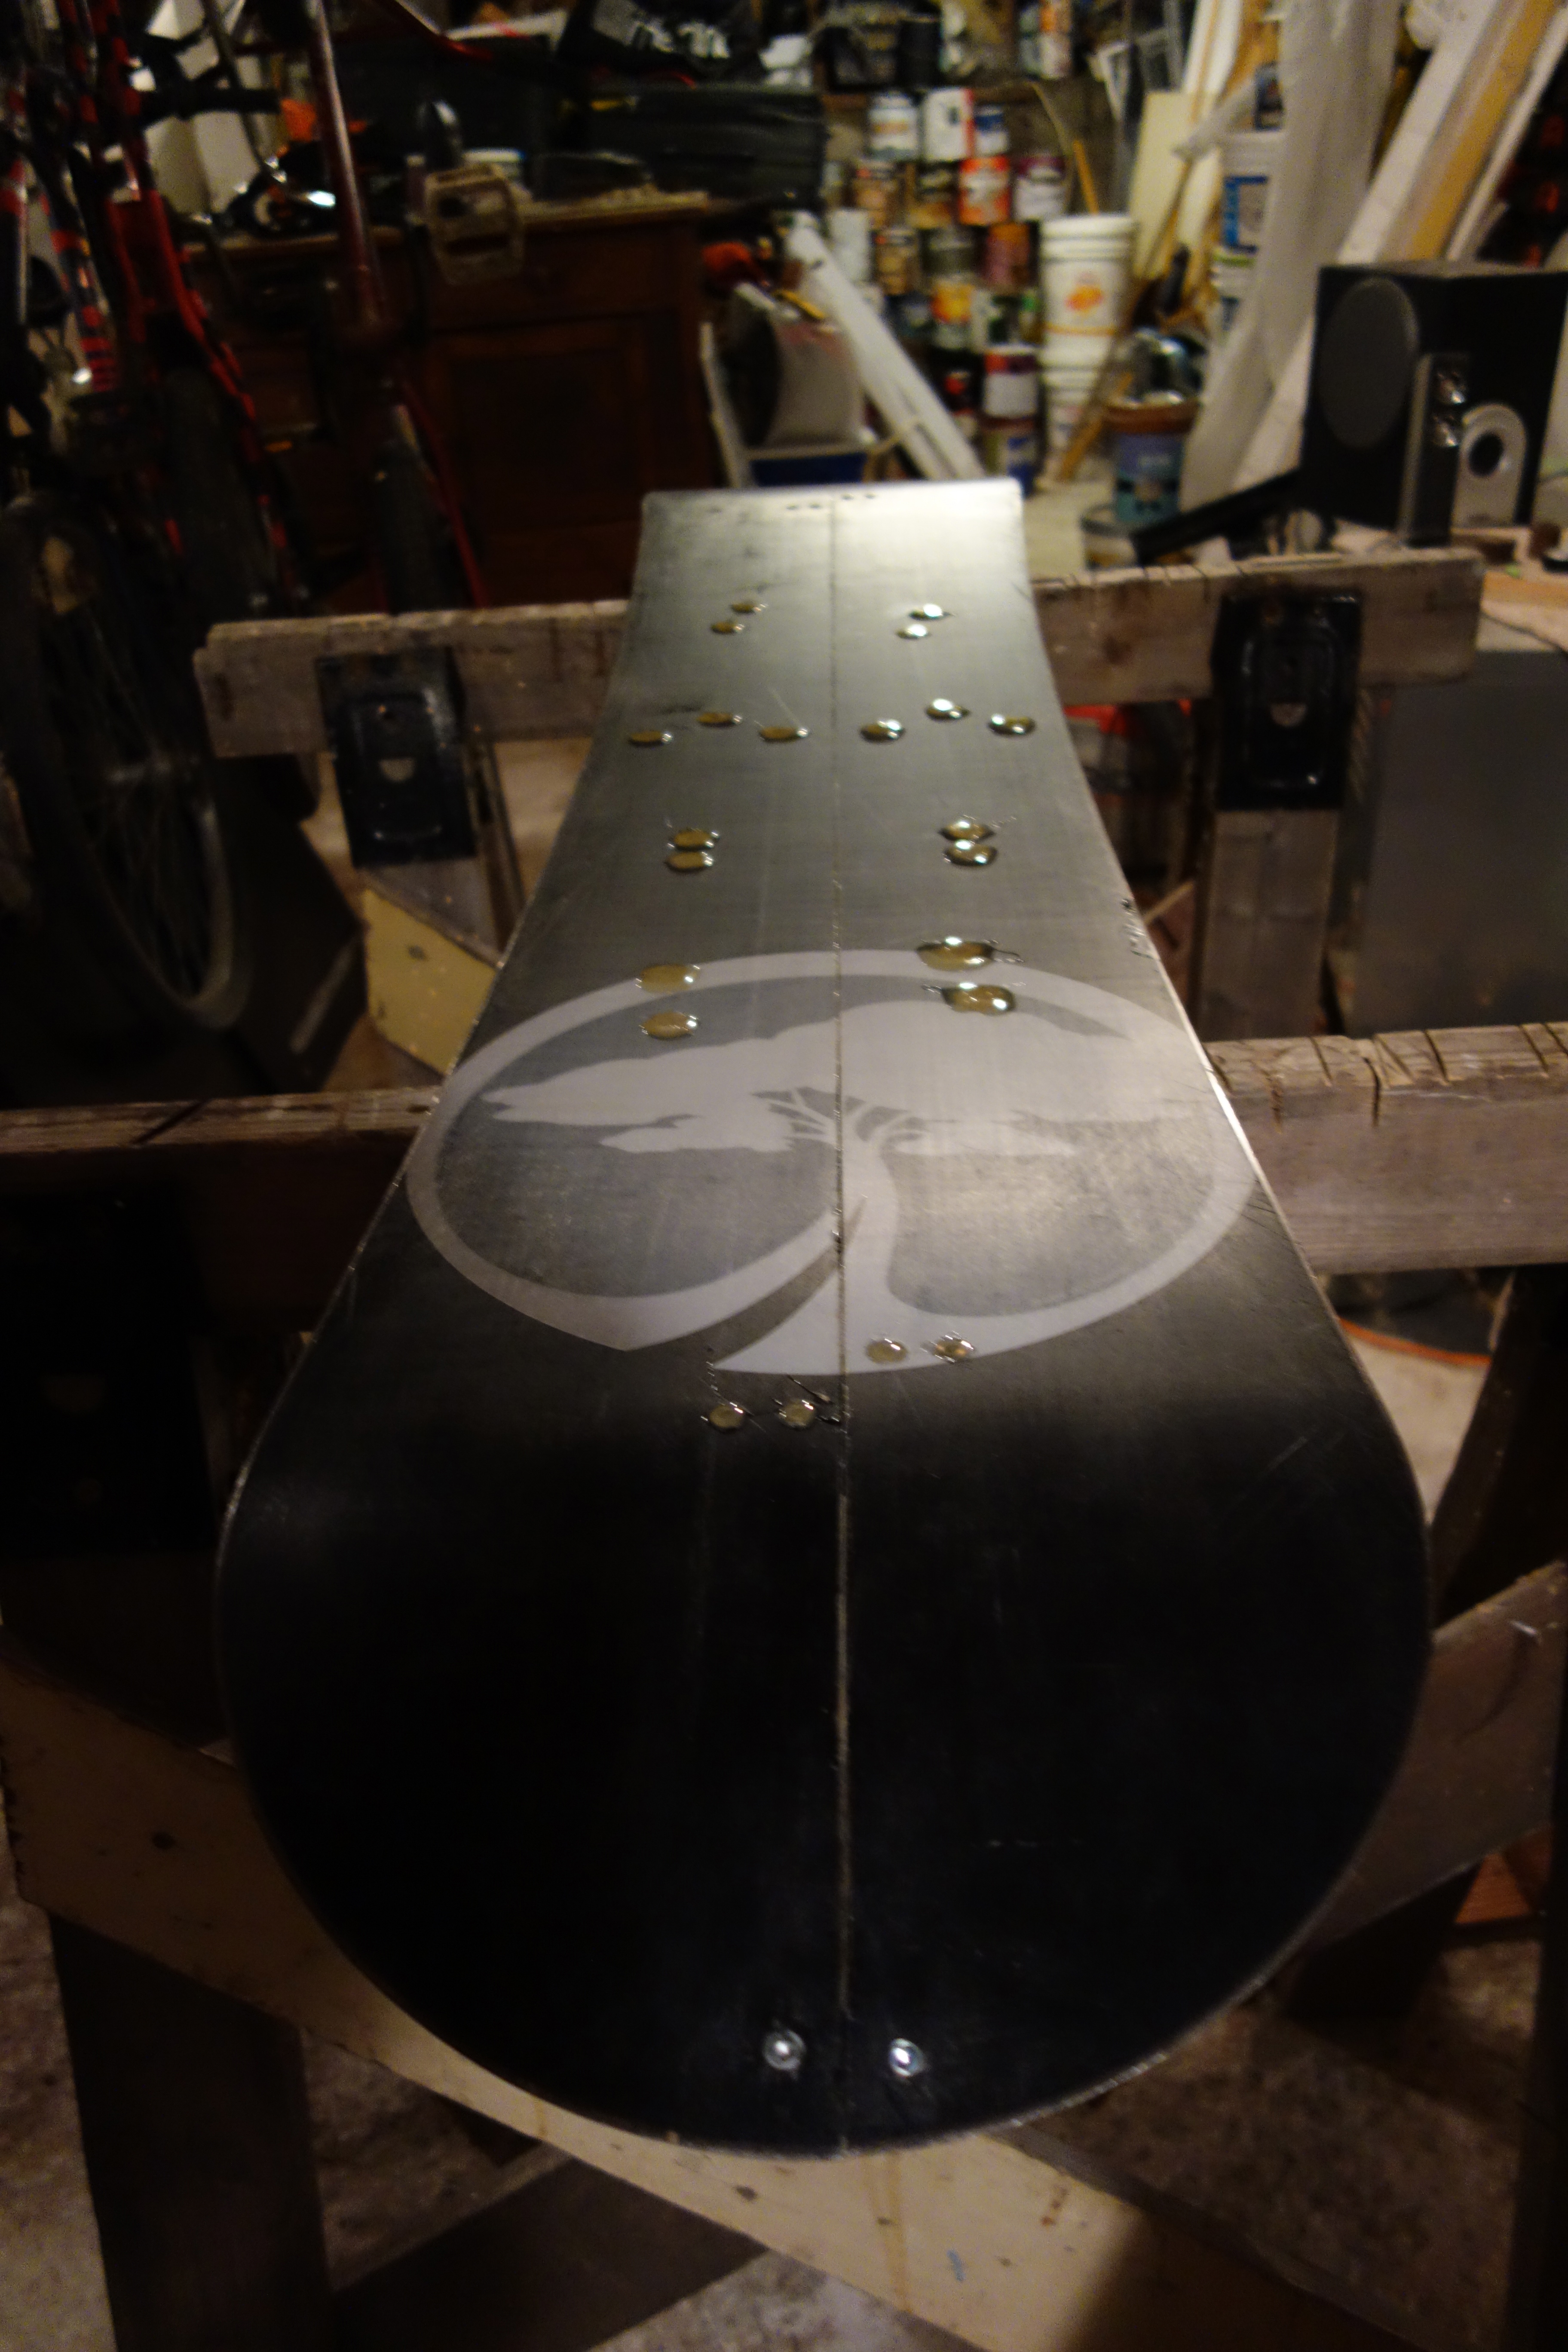
The first step is to cut the board in half, lengthways. The old adage measure twice, cut once is sound advice for this step. Somehow, despite following this process, I still managed to cut my board at an angle. I told you I wasn’t very skilled with tools! Luckily, the mistake wasn’t major, with the cut being straight but angled from the centre at the nose to about 1cm off centre at the tail of the board. With Mickey’s help, we were able to make sure the project was not lost!
After making the cut, the Voilé split kit gear needs to be mounted. This is pretty straightforward if you follow the templates and instructions in the pack. This process involves drilling holes through the board and counter sinking the screw heads to mount the latches, binding pucks, and climbing gear. The key thing is to get your boarding stance right the first time, as once the pucks are mounted, your stance cannot be changed.
When all the gear is mounted, it’s time to fill in those nasty holes on the base of the board with epoxy.

The epoxy will take up to a day to cure. This is a good chance to lightly sand the inside, cut edges of the board and apply varnish to seal the board’s core from moisture. All up, 4 or 5 coats of varnish are recommended to make sure it is waterproof and durable.
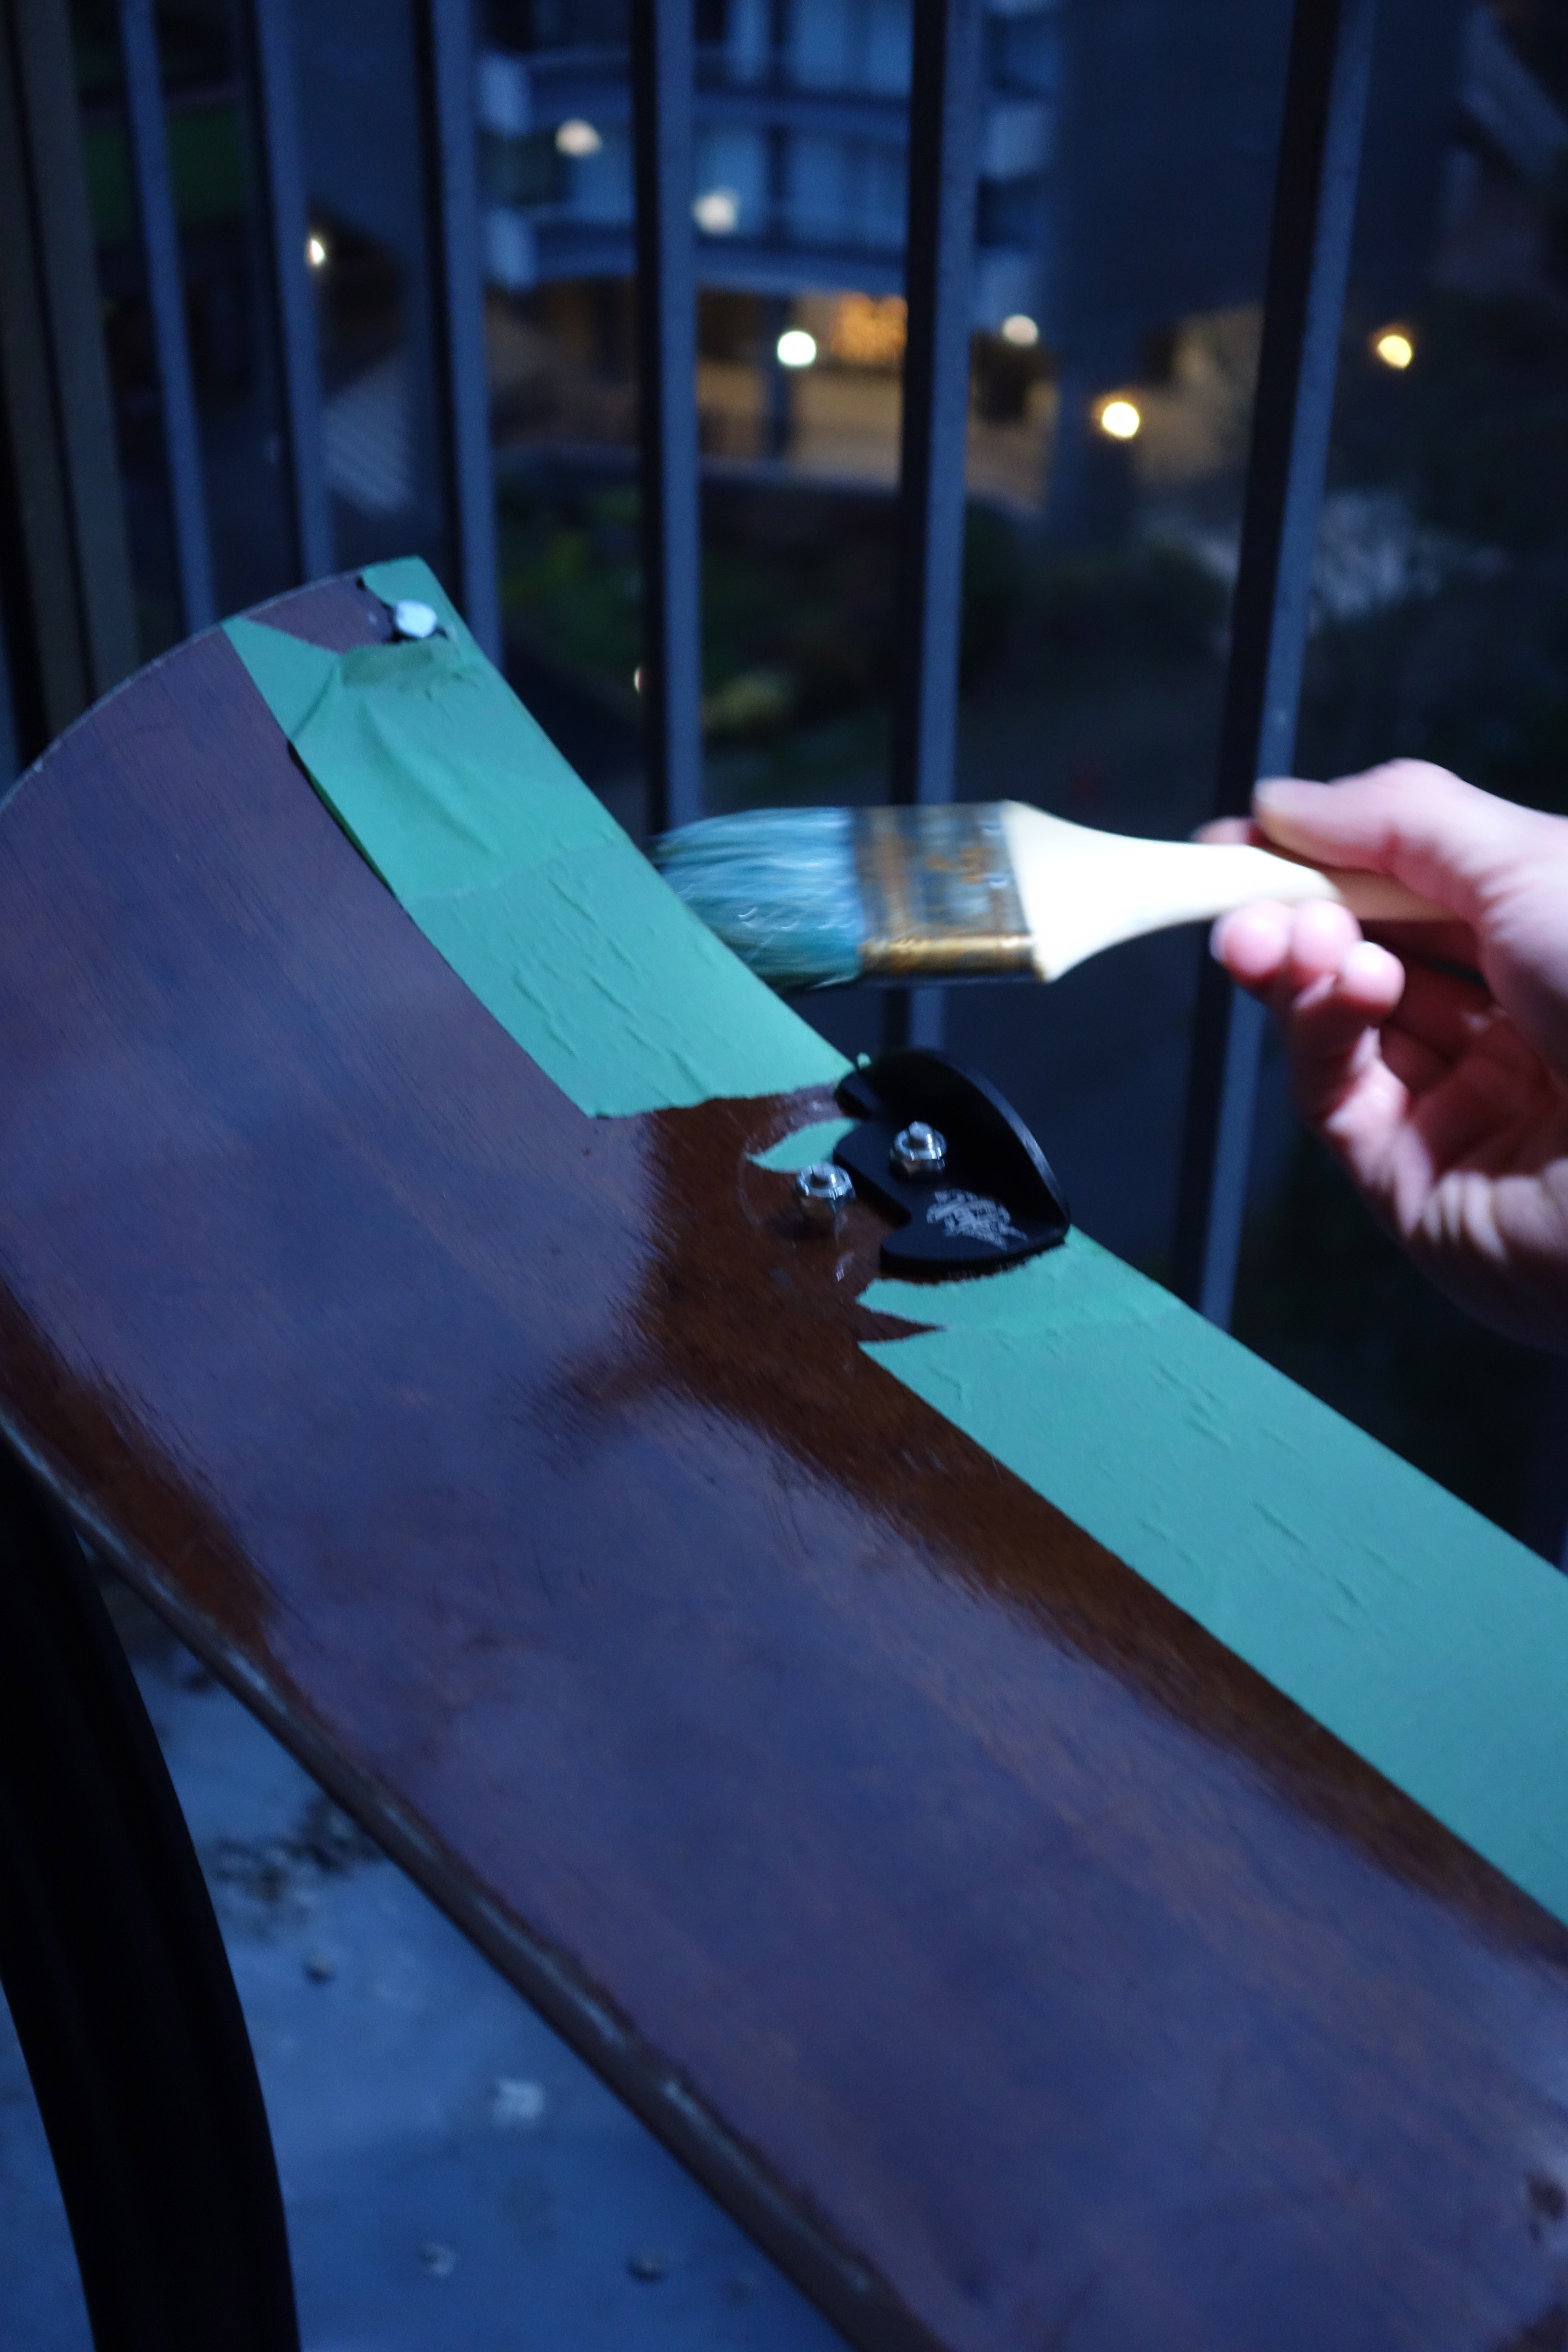

When the epoxy has dried, you will need to sand it back so the epoxy is flush with the base of the board. Then the board needs to be waxed to make sure it glides well.

Once this step is complete, the board is good to start shredding! Grab your climbing skins, poles, avalanche gear, and a good mate so you can get out there and start exploring!

